General Microphone FAQs
Dynamic vs Condenser microphones – which should you choose?
All microphones fundamentally do the same job, converting the air movements caused by a sound source into an electrical signal. The two most common types, condenser and dynamic mics achieve this in different ways, a condenser measures the variance in capacitance between two plates, one vibrating, one fixed and electrically charged, whereas in a dynamic mic a diaphragm is attached to a coil which reacts a with a powerful magnet as it vibrates.
Condenser mics need 48v phantom power to operate – most good quality interfaces and mixers have this function. Most dynamic, or ‘moving-coil’ mics do not require power to operate as their magnets already carry charge, however there are exceptions…
For example, the Aston Element is a moving coil mic with active electronics which require power, and the Aston Stealth is a dynamic mic which works in either passive or active modes. In active mode Stealth requires 48v to power its built-in pre amp.
In general, condenser mics are more sensitive than dynamics and will capture more detail, particularly in the high-end. This makes them popular as studio vocal mics and for recording acoustic instruments. Dynamics tend not to reproduce high frequencies with as much accuracy as condensers but this may not be a problem depending on the sound source and the application – high-end ‘sparkle’ is not always desirable.
Dynamic mics are good for capturing loud sound sources, such as drums (or screaming metal vocalists!). Their resilience also makes them the usual choice for live vocals, especially where the mic is to be hand-held.
The only real rule for choosing a mic is that if it sounds good, go with it.
Origin or Spirit – which is the best large diaphragm condenser mic for you?
Despite sharing many design features Origin and Spirit are, in fact, completely different mics in terms of electronics and sonic character. Although Spirit tends to cost a little more it’s not really a question of it being ‘better’ than the Origin (both mics are used extensively in the world’s top studios) but which is more suitable for you and your projects.
In terms of features the main difference is that Spirit offers selectable polar patterns, so if you need to pick up sound in figure of eight (front and back) or omni (surround) situations then Spirit is the choice.
But for recording single vocal or instrument sound sources the trusty cardioid pattern found on both mics is the most commonly used and so the Origin vs Spirit question comes down to personal preference; Origin, the ultimate all-rounder with a warm, natural sound that sits easily in your mixes, or Sprit, with its sparkling and detailed high end and ‘open’ sound.
Stereo mic techniques
Captured and used carefully, stereo recordings can open up your mixes and be the difference between a good track and a great one.
It can be fun and rewarding to experiment with the placement of two mics, but there are pitfalls to be aware of. Using different model mics can make it difficult to get a balanced, cohesive sound. And placing mics different distances from the sound source will introduce phase issues, where opposing left and right waveforms cancel each other out. Although there are ways to fix phase problems in the mix, far better to capture the audio evenly to start with. Checking your recordings in mono is a good way to test for phase cancellation. If any components sound thin or have all but vanished, then there are probably conflicting waveforms present.
If you’re trying stereo recording for the first time, here are three popular methods which should be good starting points if adopted using a pair of identical model microphones.
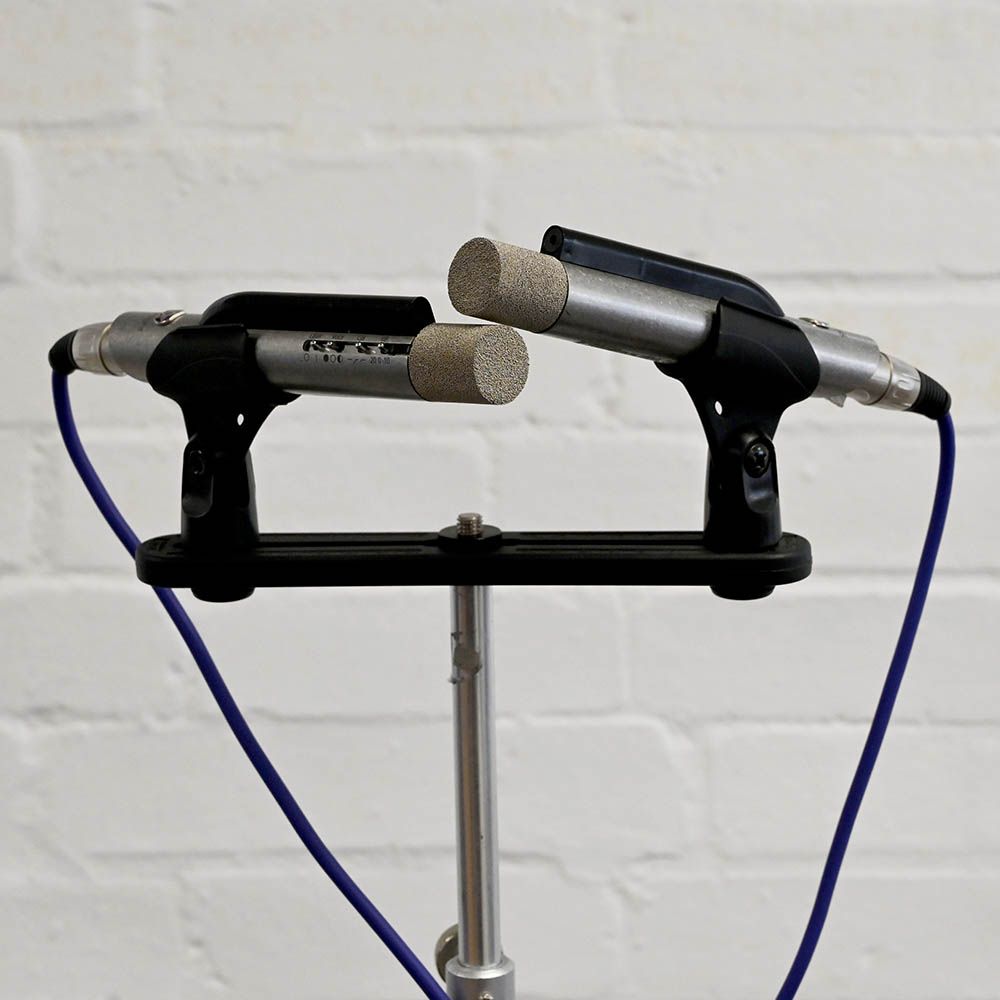
X/Y stereo microphone technique
Probably the most used stereo set-up, the X/Y technique sees two identical mics set at right-angles, with their capsules aligned to minimise any phase issues. You’ll usually get the best results with mics which are quite directional (i.e. with good off-axis rejection) so from the Aston range the Starlight small diaphragm condenser or the Stealth would be ideal. As both these mics have multiple voices make sure the pair you’re using are set the same.
X/Y does not give the widest stereo soundscape, although increasing the angle between the mics gives a degree of control over this.
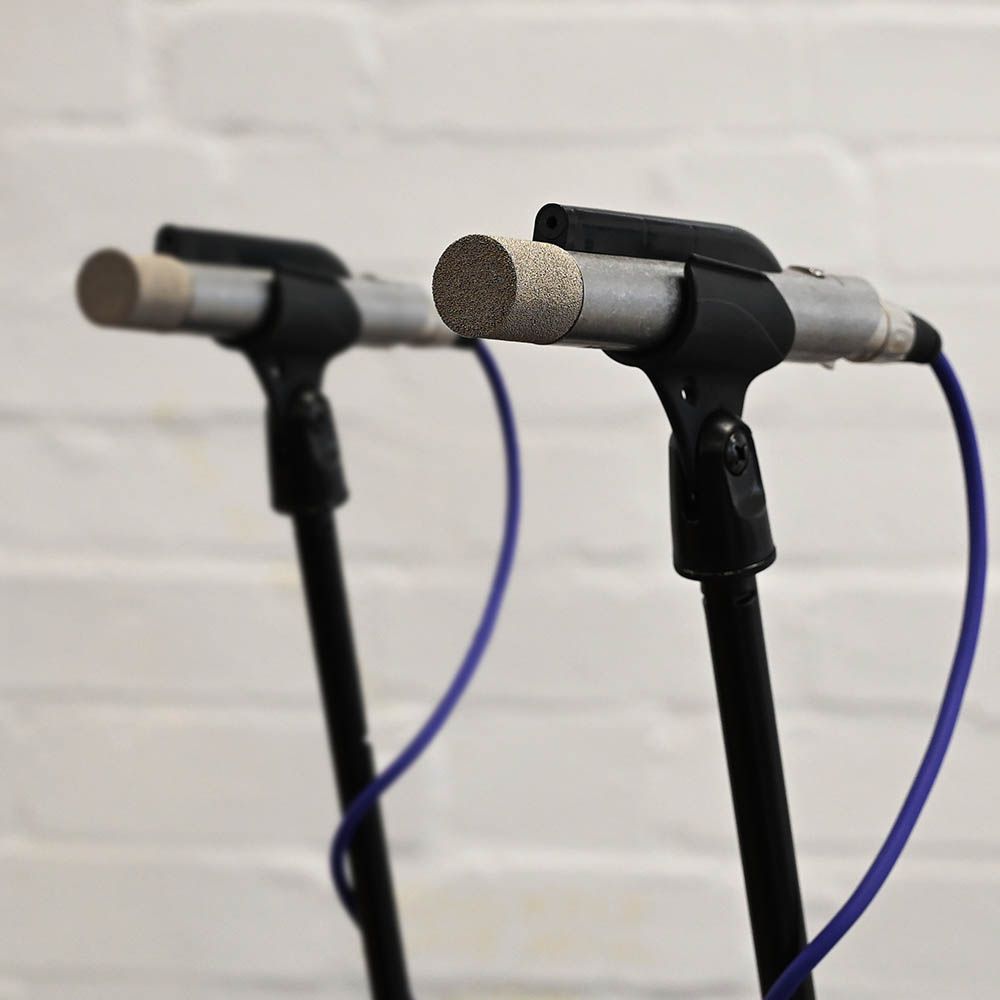
A/B stereo microphone technique
Also known as the ‘spaced pair’, the A/B technique utilises two mics, both pointing towards the sound source. These are spaced apart to taste, typically between 1m-3m. The mics can be cardioid, for focussed stereo capture, or omni for more ambient results. Like X/Y (above), A/B gives a subtle stereo spread rather than extreme width. The wider apart the mics the wider the stereo picture although the distance between them invites phase and level issues.
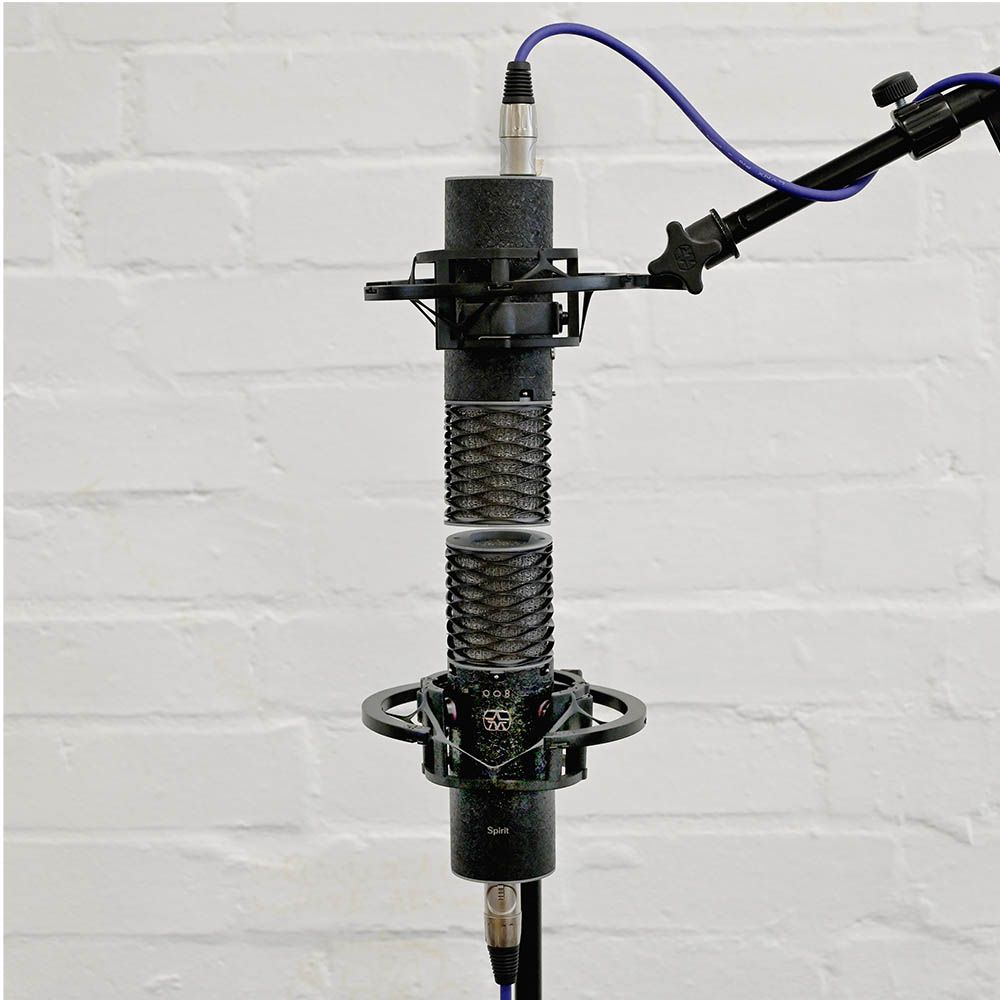
Mid/side stereo microphone technique
The mid/side stereo technique has the advantage of giving you post-recording control over the width of your stereo spread. It also avoids any significant phase issues as the two mics’ capsules are in close proximity. You’ll need a mic with a figure-of-eight polar pattern and one with a cardioid pattern. These can be different models, however using two of the same, multi-pattern mics, such as the Aston Spirit, will give consistent sound and make level-matching straightforward.
The two mics should be stacked with their capsules as close together as possible, the cardioid mic facing the sound source and the figure-of-eight such that it is picking up sound from either side.
Although there are dedicated mid/side decoding solutions available you can achieve full control over the stereo recording in your DAW, so long as it has the ability to phase-reverse (all the major DAWs do). The recording from the cardioid mic should be panned centrally. Then the figure-of eight recording should be duplicated with the resulting pair panned hard left and right. Then you need to phase-reverse one of these (It’s a good idea to group the pair or send them to a bus so their levels can be changed simultaneously).
By combining the three channels you now have a stereo spread comprising centre + left and centre + right. The ‘secret sauce’ is that by changing the level of the two side channels in relation to the centre, you can now increase or decrease the stereo width of your recording to fit the needs of your mix. Cool huh?